How to sight in a classic scope or Rifle Scope Zeroing in details
If you are an owner of Digital Scope, click here to move to your part of the article.
Firearm zeroing consists of two main phases:
- selecting the ammunition you are going to fire;
- sight adjustment for the ballistic trajectory of the ammunition you chose.
When using a different cartridge (with a different bullet weight or ballistic coefficient), you would have to zero your firearm anew.
- To zero a firearm, you need:
- rifle holder to fix the rifle firmly in place and precisely adjust its position vis-à-vis the target;
- laser cartridge for "cold zeroing" (optional, to help reduce ammo spending);
- cartridges (at least 9);
- zeroing target;
- ballistic calculator;
- notepad and pencil.
The purpose of carbine zeroing may be "hunting" or "tactical", in which case, the only difference would be the zero distance.
Most sights for hunting rifles have a fixed parallax sight-in at 100 m, and are used for firing at the distance of 50 to 300 m. On the other hand, tactical sights are usually used for firing at targets located within the range of 15 to 200 m.
Selecting the right zero distance helps avoid a huge range of vertical adjustments when firing at too short or too long distances, and therefore, firearms are zeroed for the distance of 100 m for hunting and 50 m for tactical purposes.
In addition, carbines usually used for tactical purposes are AR-15-based (having caliber .223rem), and this cartridge has very interesting ballistics.
Thus, for zeroing at 50 m, deviation of the average impact point at 20 m will be only 3.4 cm from the aim point.
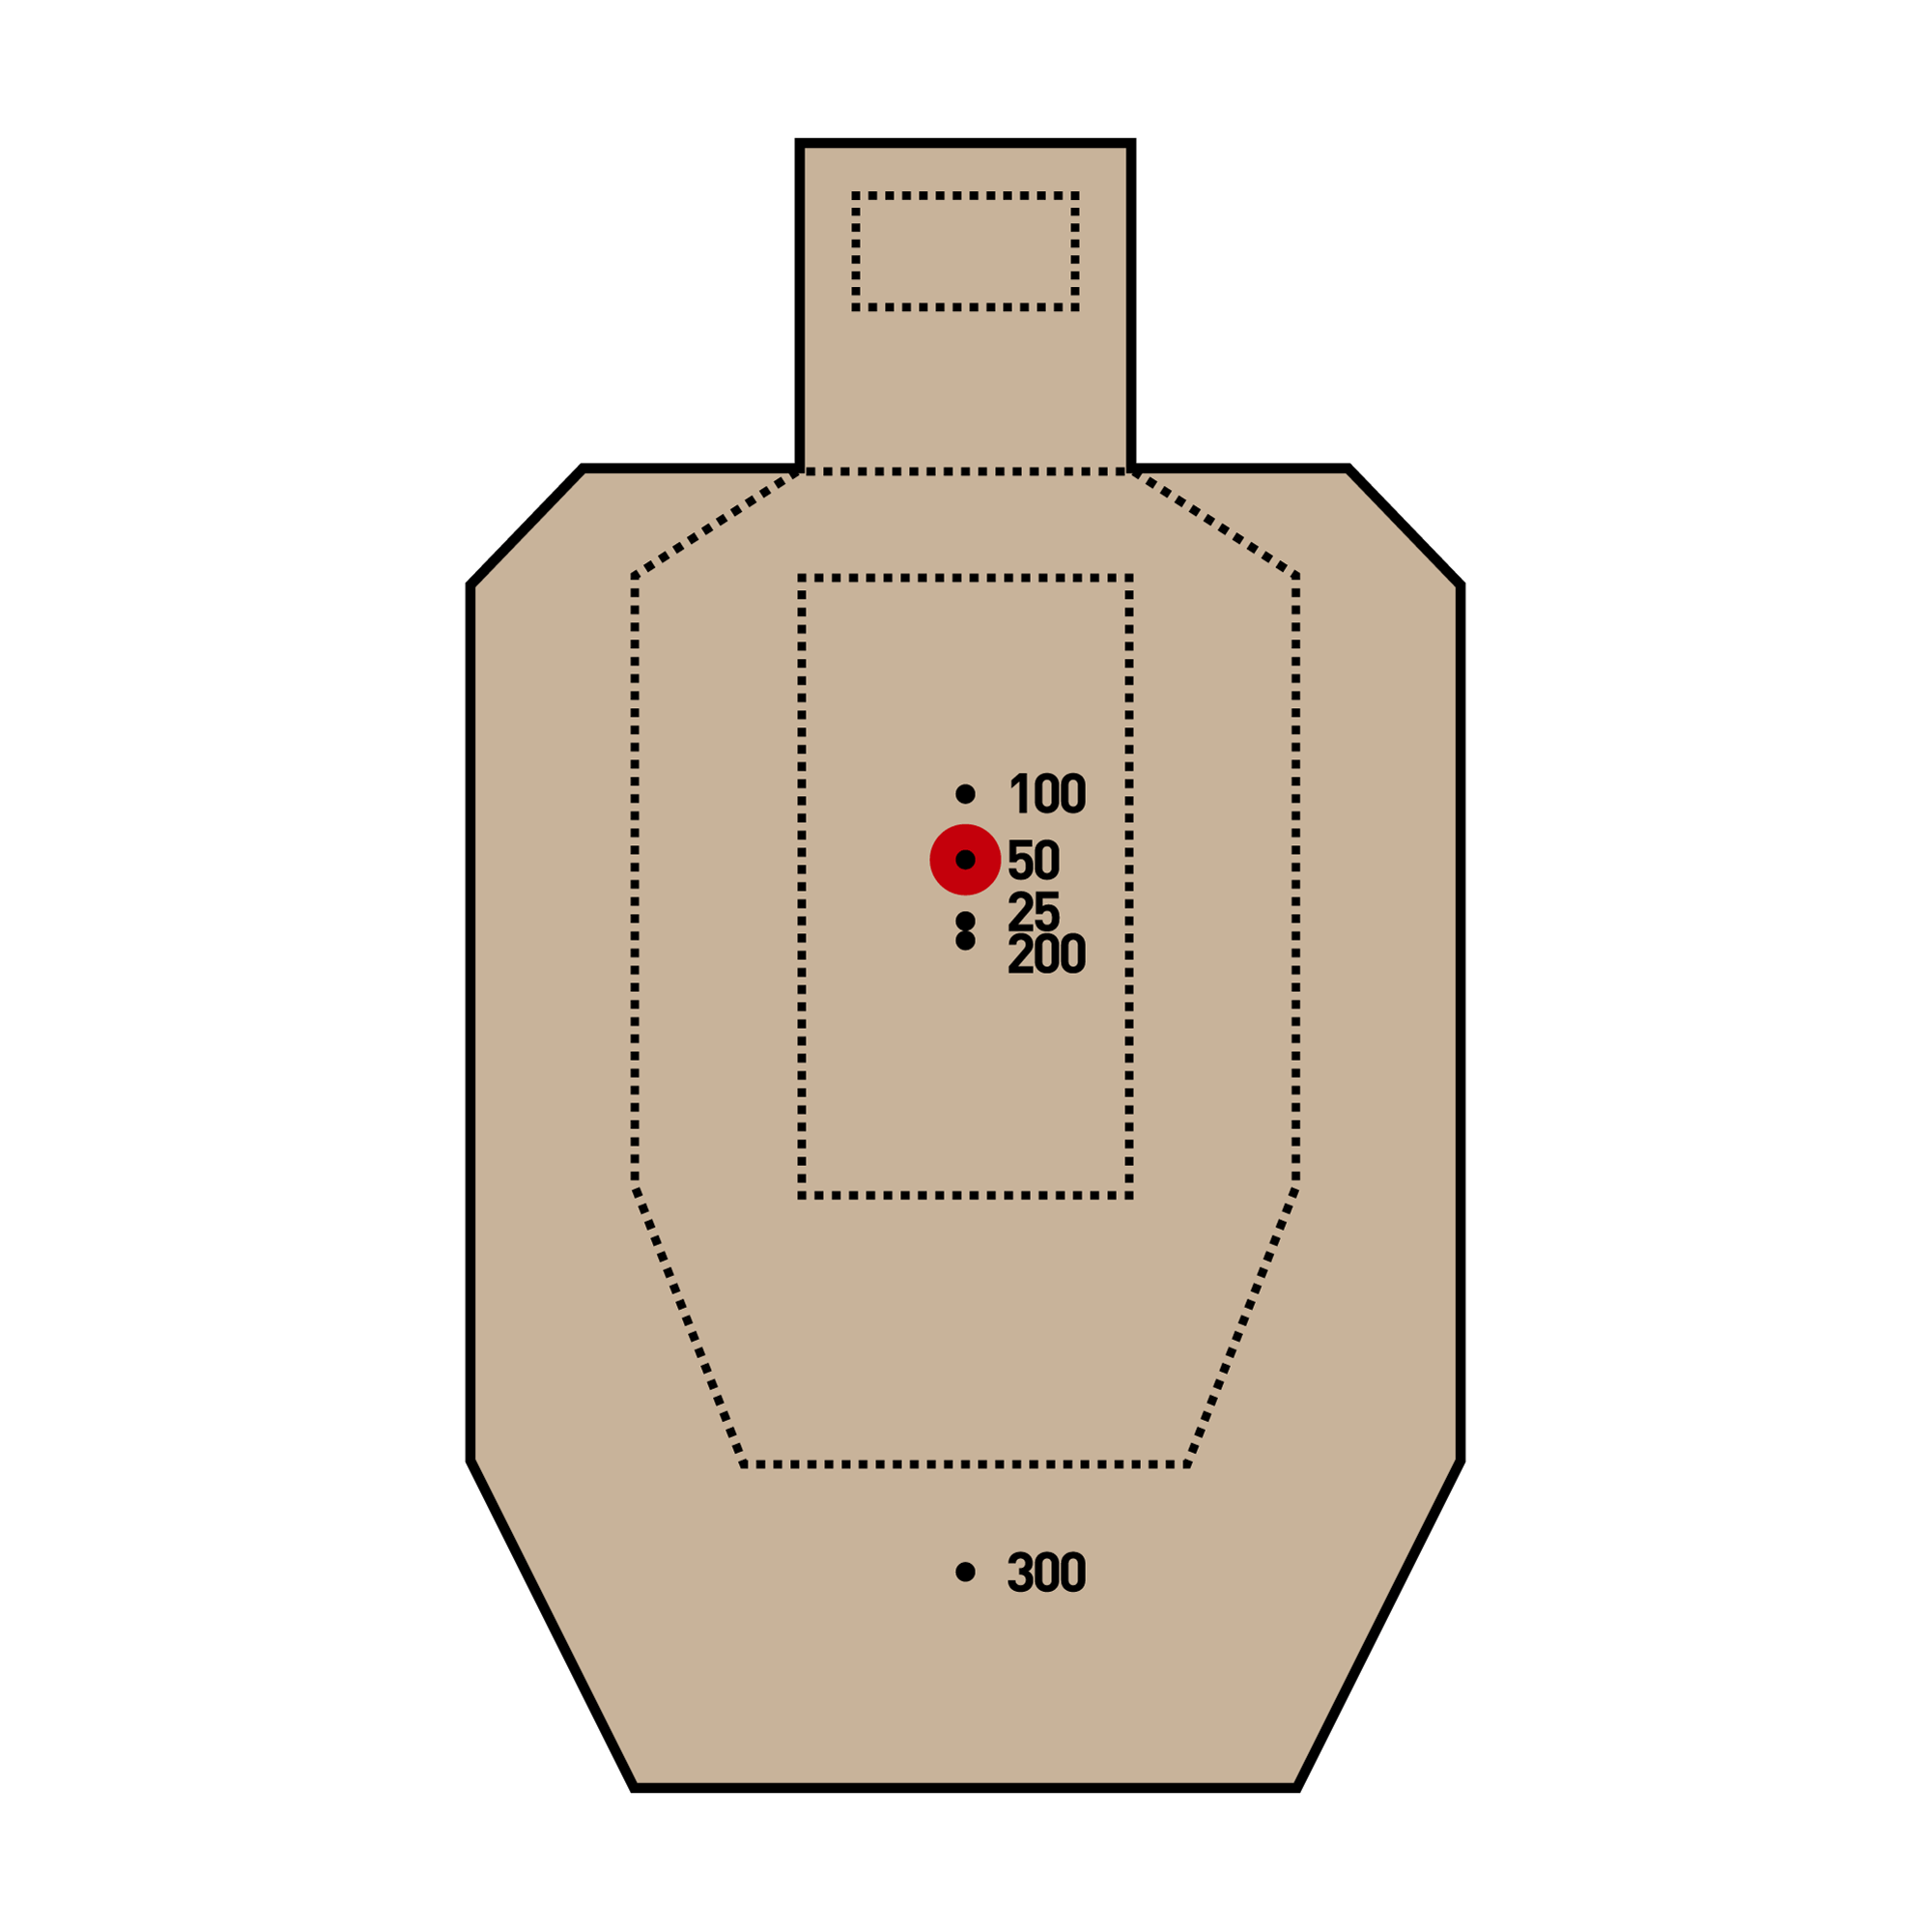
- at 100 m: 4.7 cm;
- at 200 m: 3 cm;
- and at 300 m: 16 cm.
Therefore, after zeroing your carbine at 50 m, you won’t have to make any vertical adjustments at all when firing at 10 to 200 m, simply aiming at the center of the target and hitting all rounds within an area of the size of a cigarette pack.
But let’s get back to zeroing:
- Make sure your firearm is not loaded!
- Place the rifle into the rifle holder and aim it at the target set at the required
distance.
For the convenience of aligning the bore of a bolt-action rifle with the target, you may take off the bolt and control the aiming visually, through the barrel.
If design of your rifle/carbine does not allow you to look into the barrel from the chamber part, you may use a laser cartridge.
- Load one cartridge and fire the rifle.
Mark this impact point on the target, and disregard it for future references.
This is the so-called "shot from cold barrel", which often produces uncontrolled "deviation" from the main shot group.
If you do not hit the target at all, adjust the rifle’s position and fire the next round.
- Load four cartridges and fire four rounds in the center of the zeroing target.
-
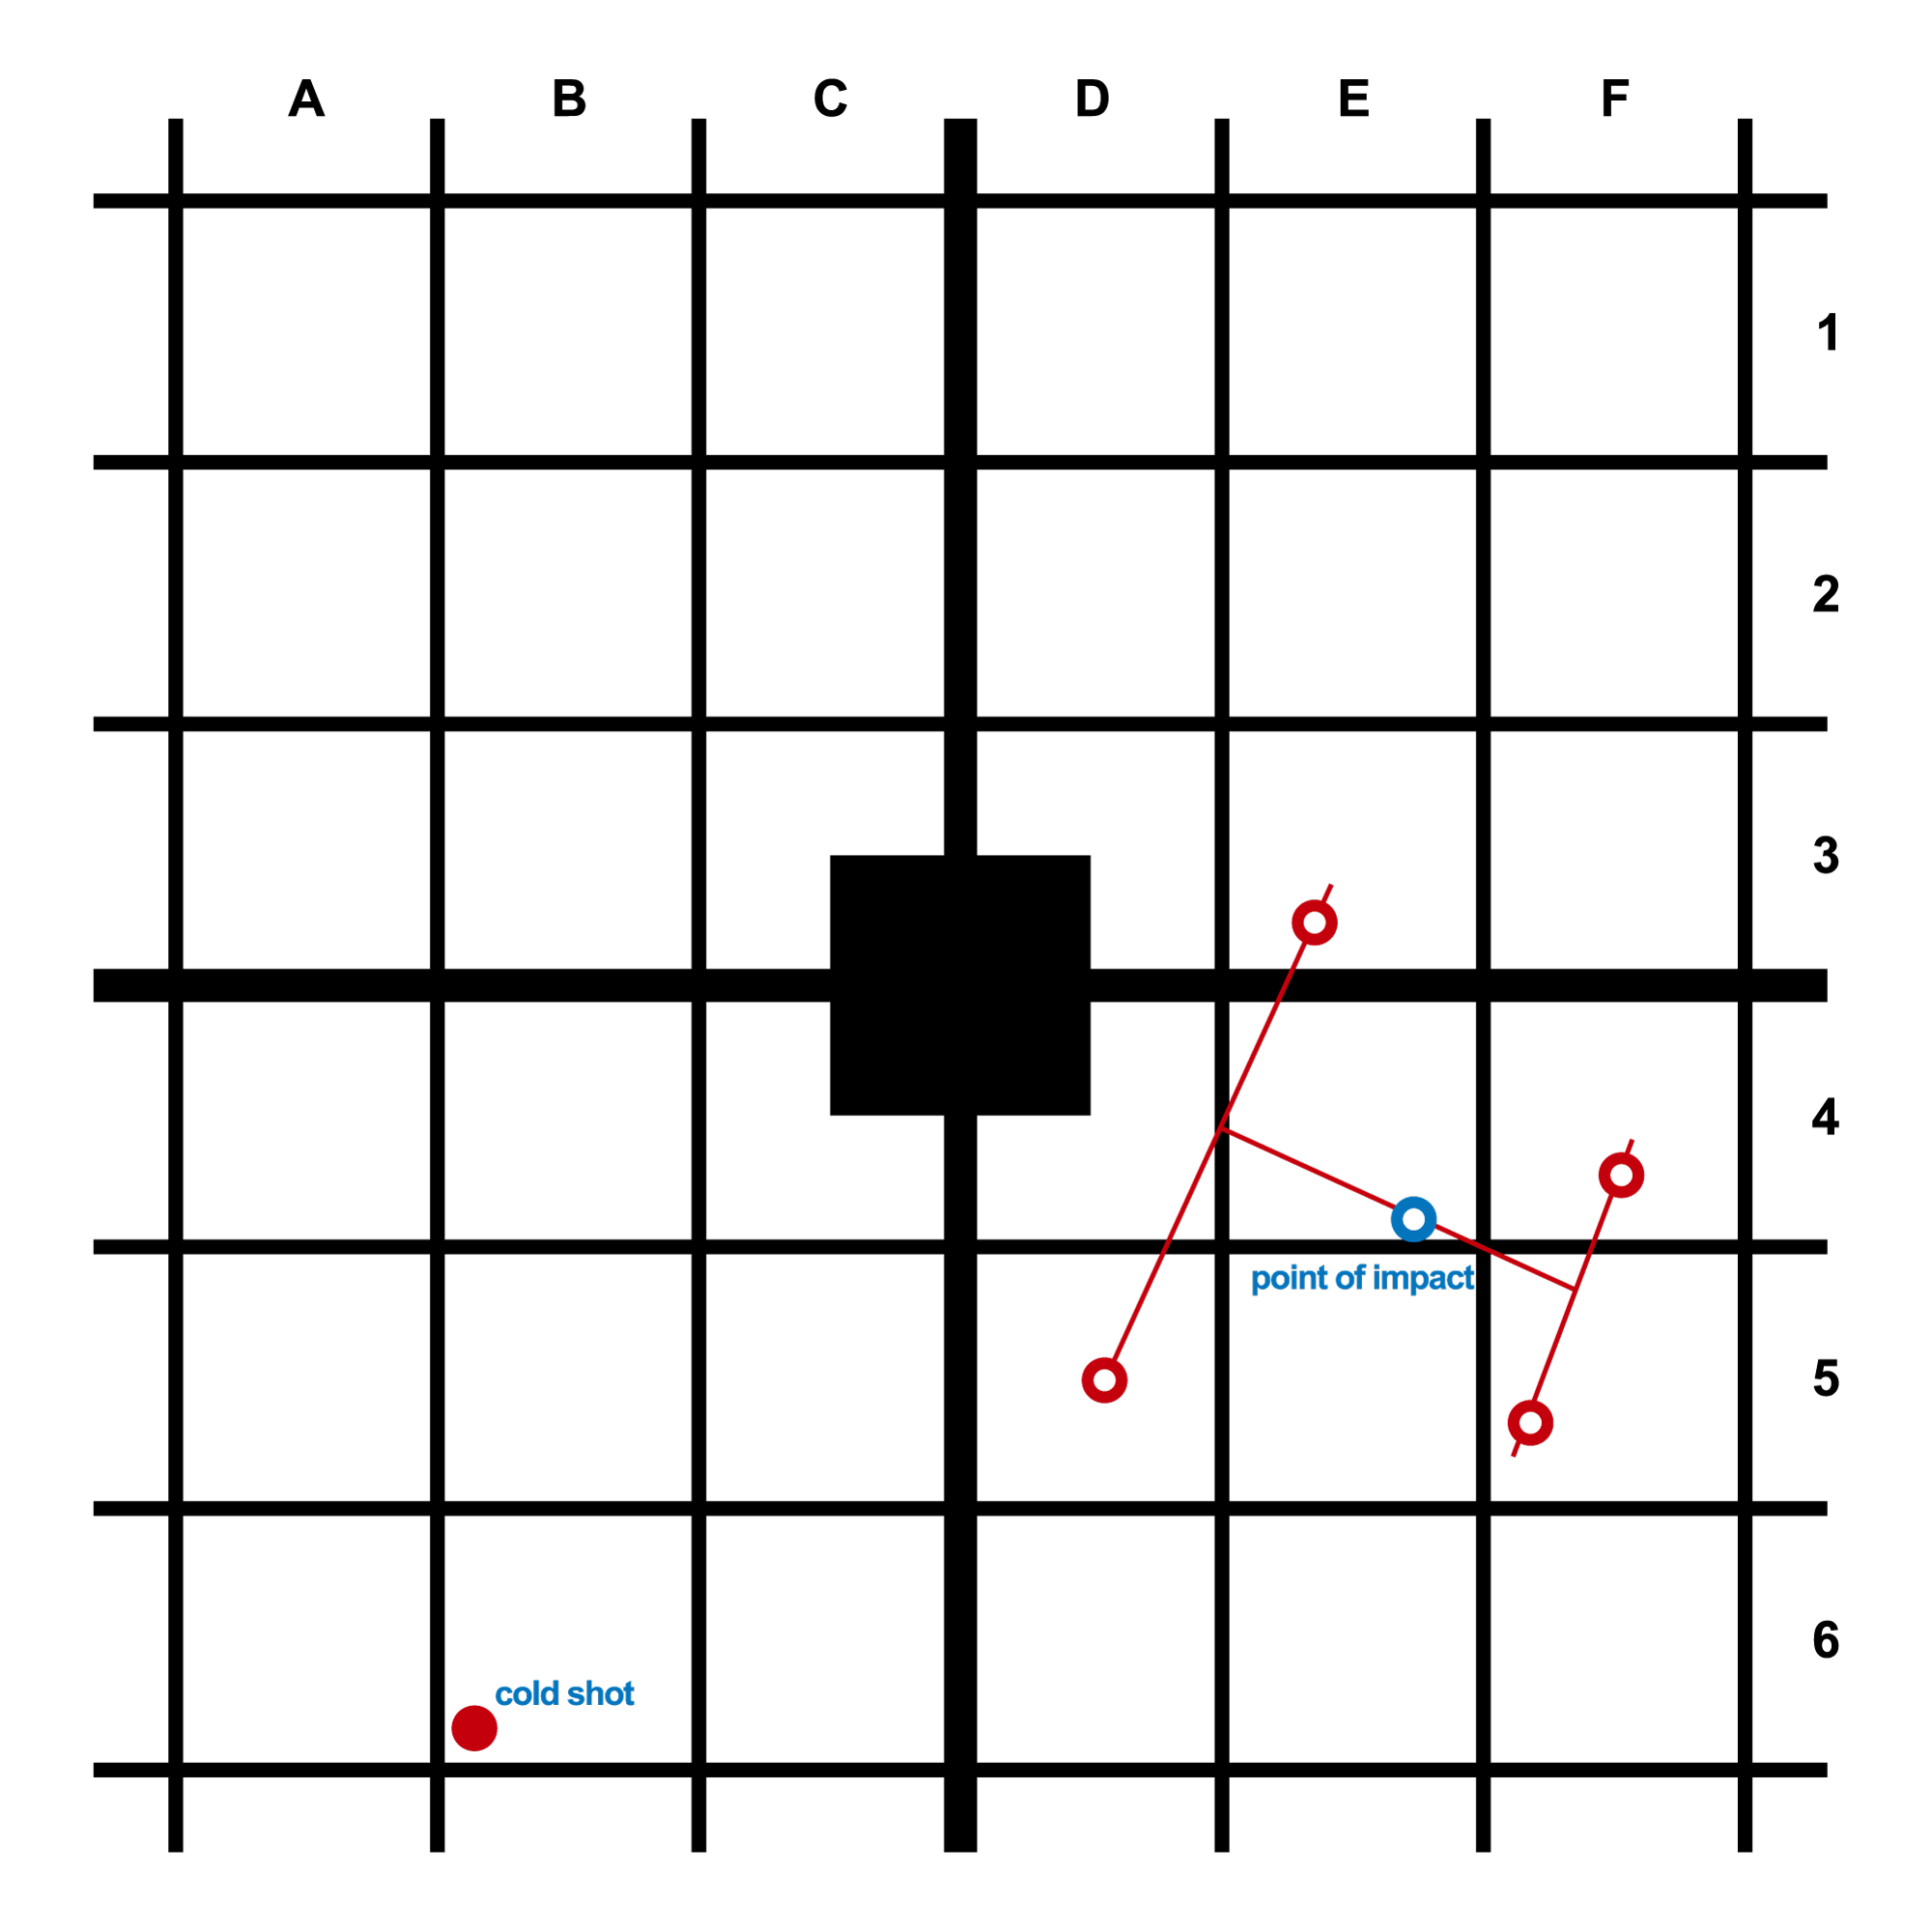 Determine the average impact point (AIP) by:
- drawing vertical lines between the two extreme impact points on the left and on the right;
- drawing a horizontal line between the middle points of these vertical lines;
- AIP will be located in the middle of the horizontal line.
- Determine, in minutes of angle (MOA), deviation of AIP from the center of the target by:
- measuring the vertical and horizontal distance between AIP and the center of the
target;
- if you are using the imperial system, just remember that 1 inch at 100 yards is equal to one minute of angle or 2 minutes at 50 yards;
- if you are using the metric system, divide the values (in centimeters) by 2.9 for the zero distance of 100 m or by 5.8 for the zero distance of 50 m;
- write down the results.
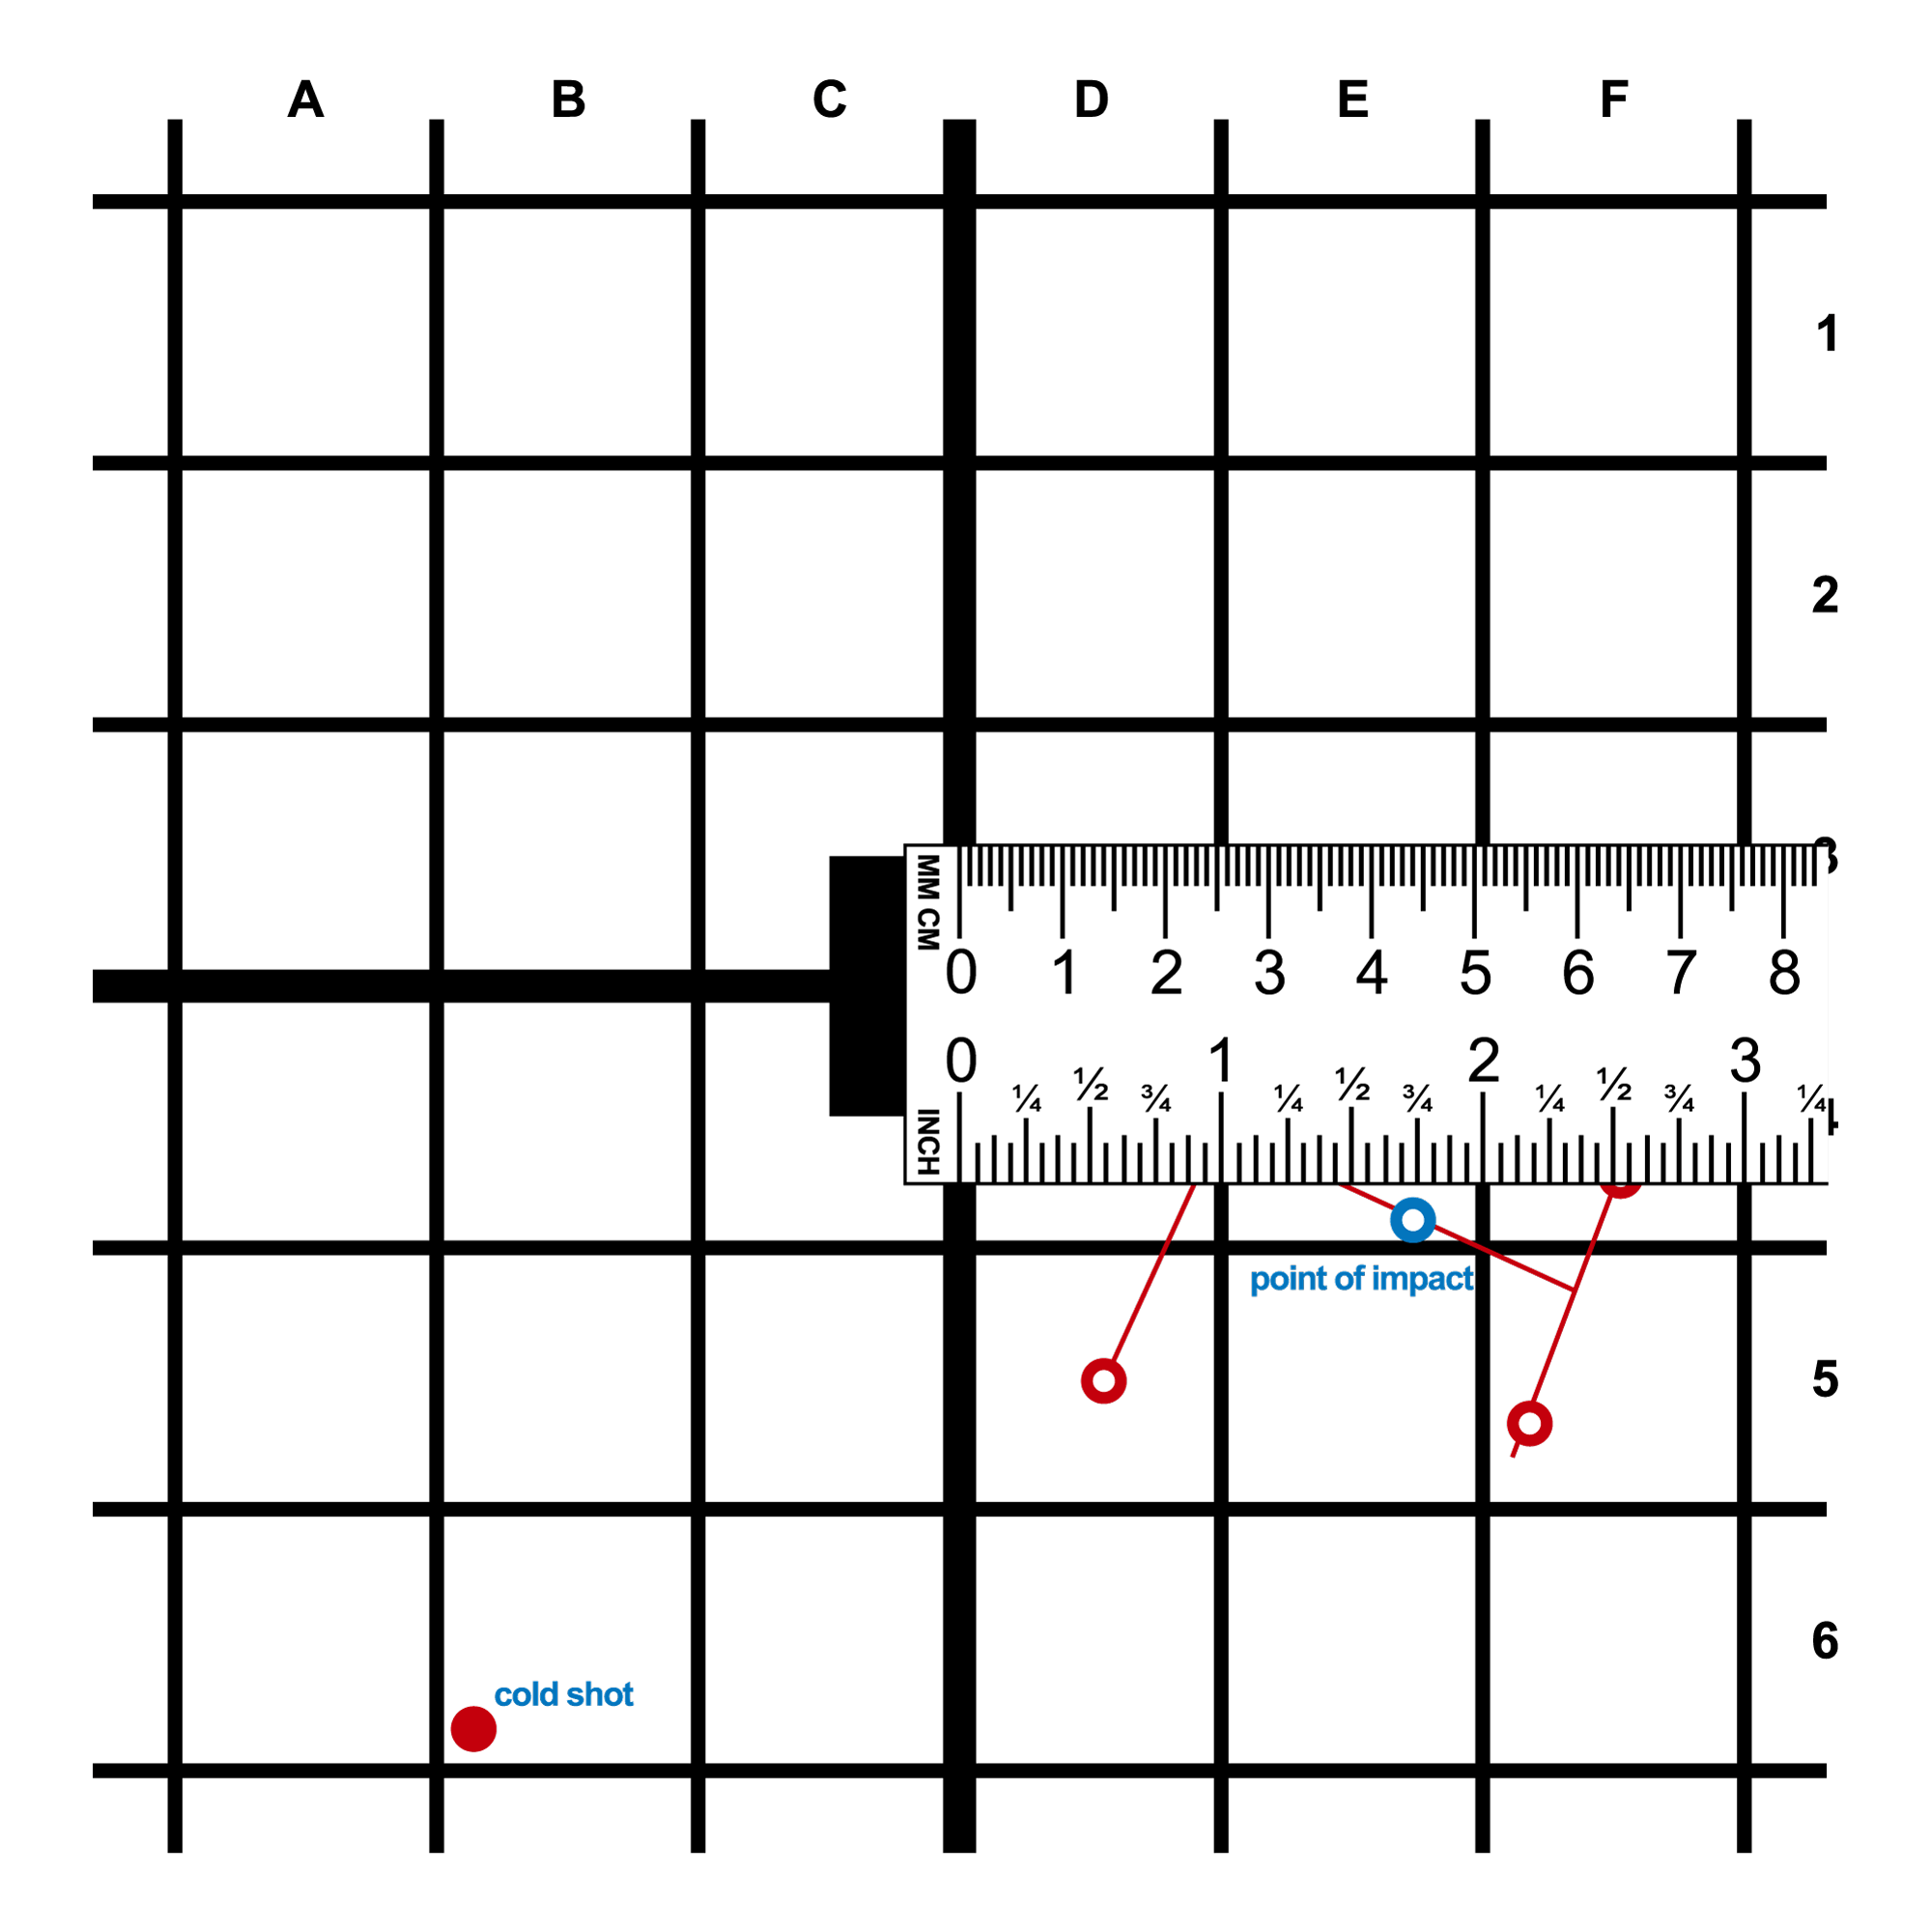
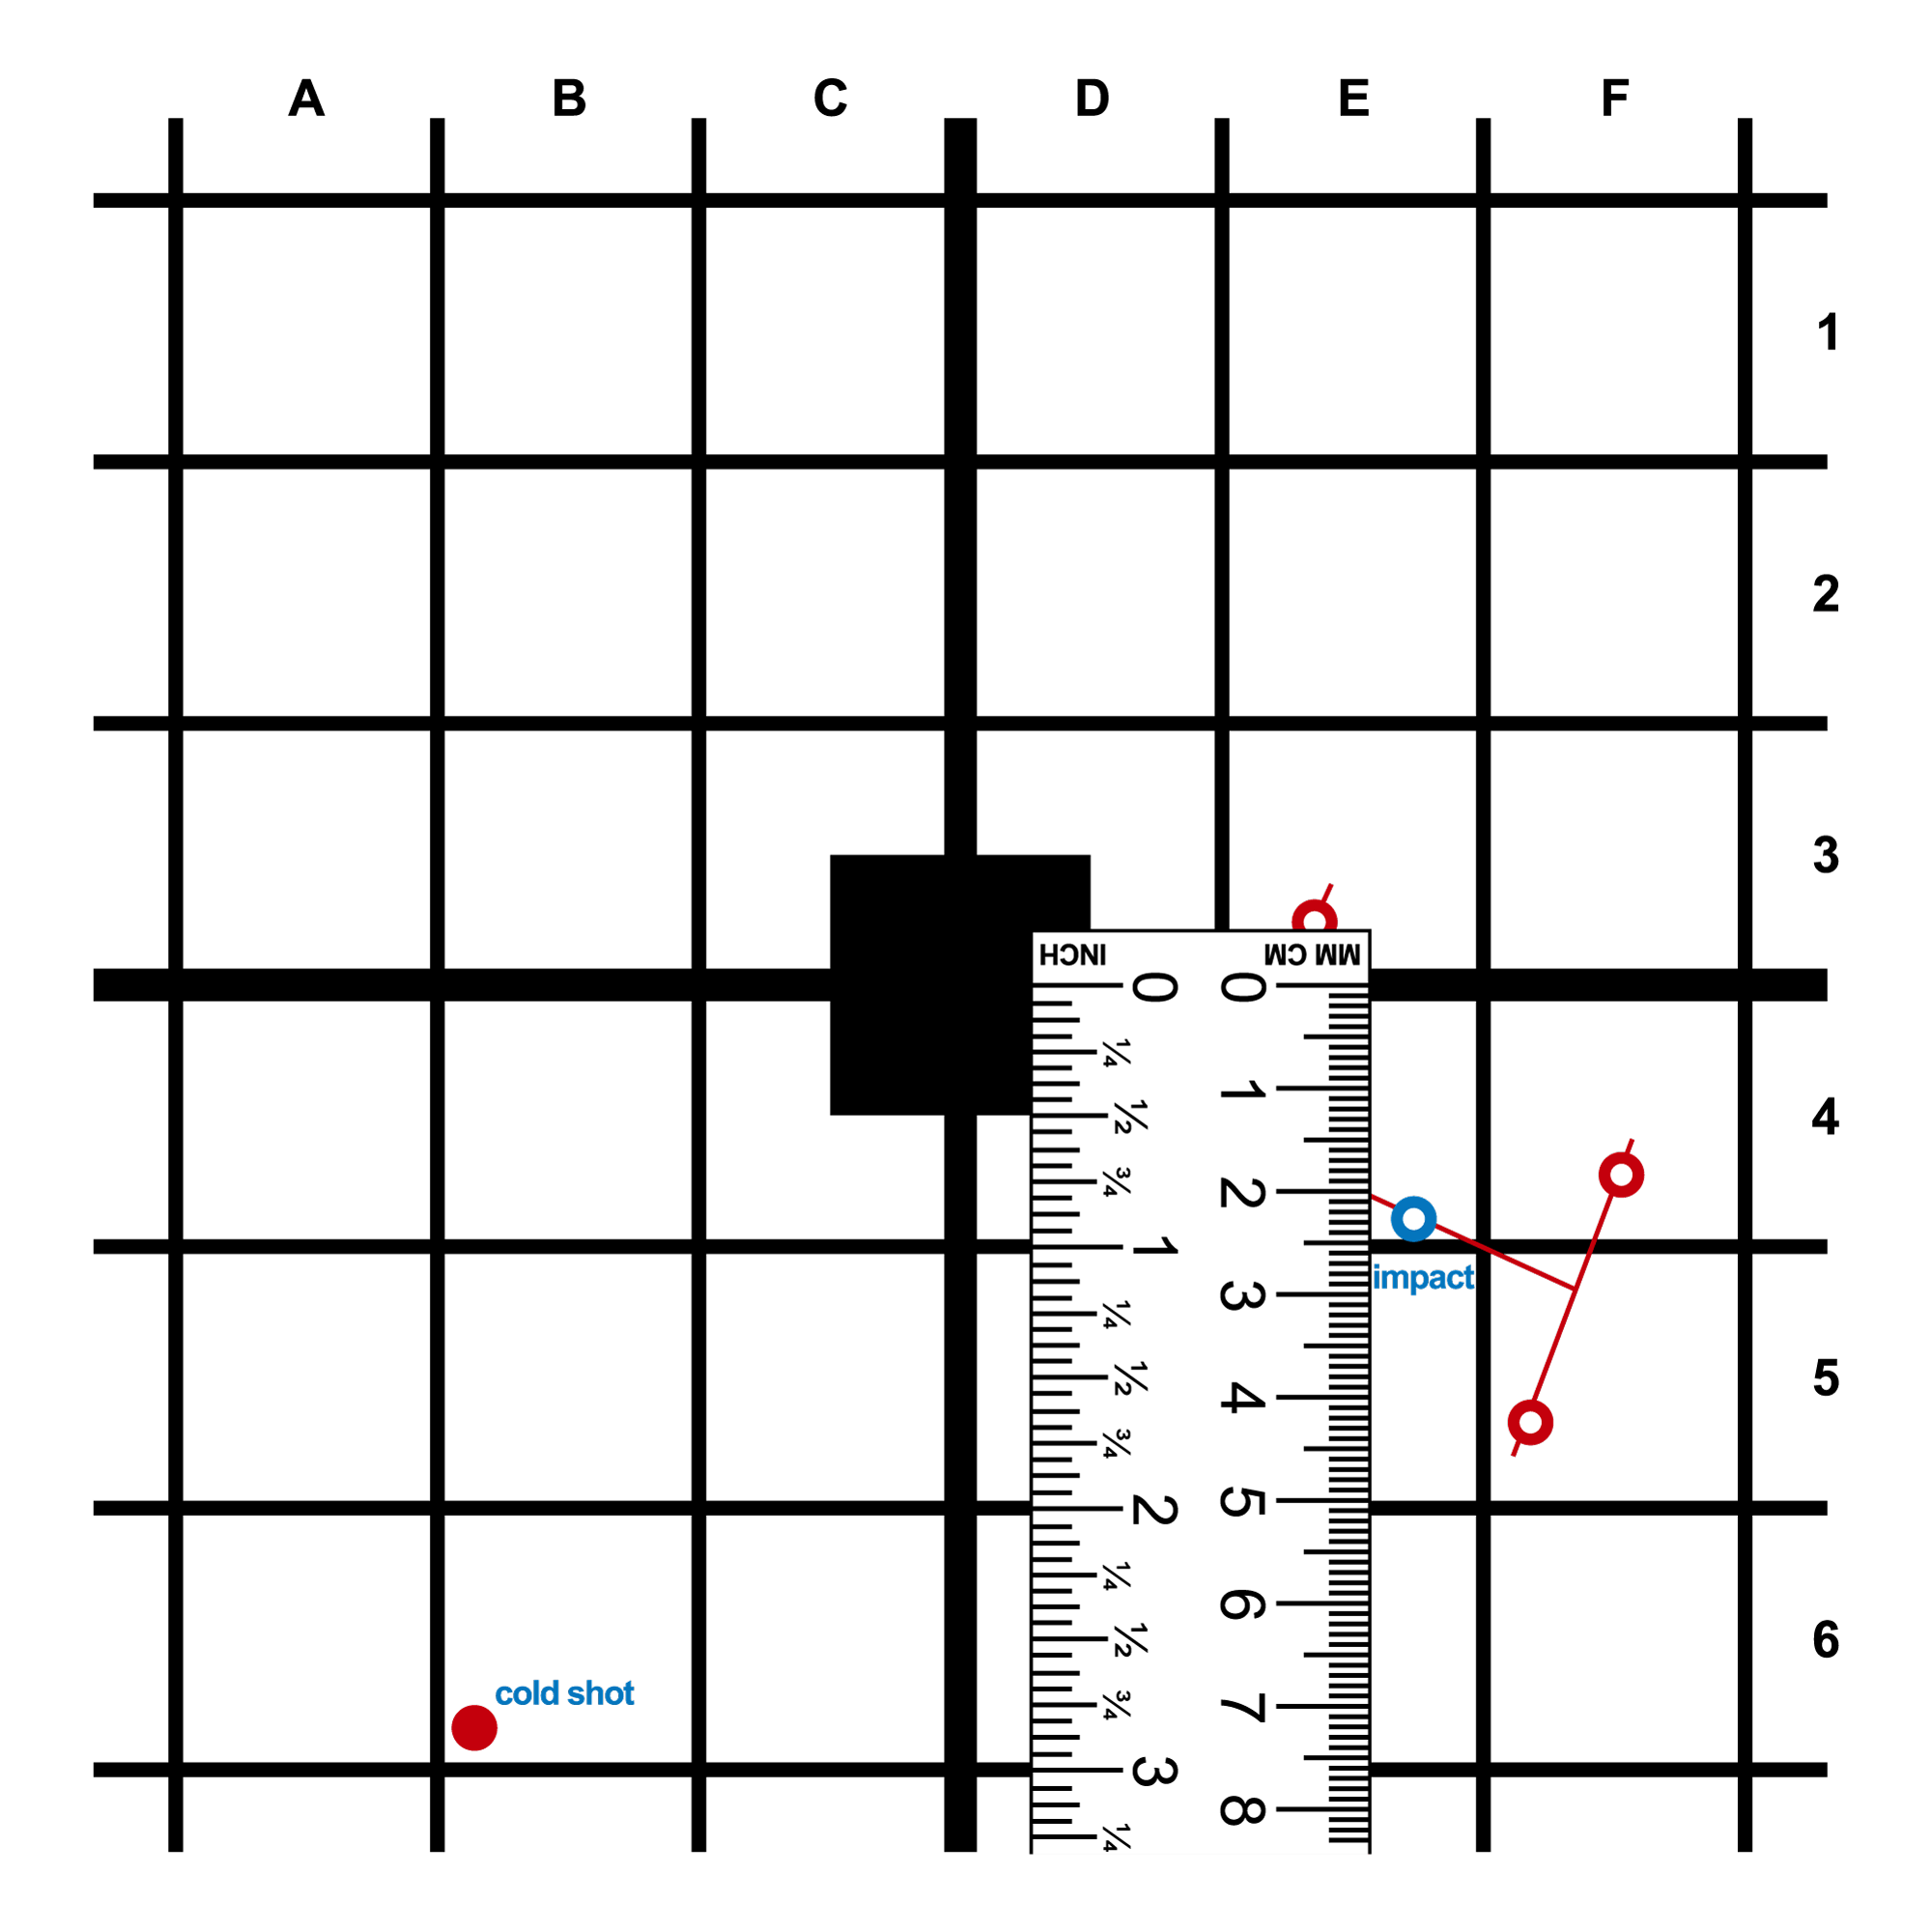
For the convenience of shooters, manufacturers offer zeroing targets with a grid in 1 MOA increments for a particular distance. Using these grids, you can calculate deviations by simply counting the grid squares.
- measuring the vertical and horizontal distance between AIP and the center of the
target;
-
To adjust the sight, you have to determine, first of all, its reticle movement per click.
This information is usually found on the sight itself or in the instruction.
Standard values: 1/2 МОА, 1/4 МОА, 1/8 МОА
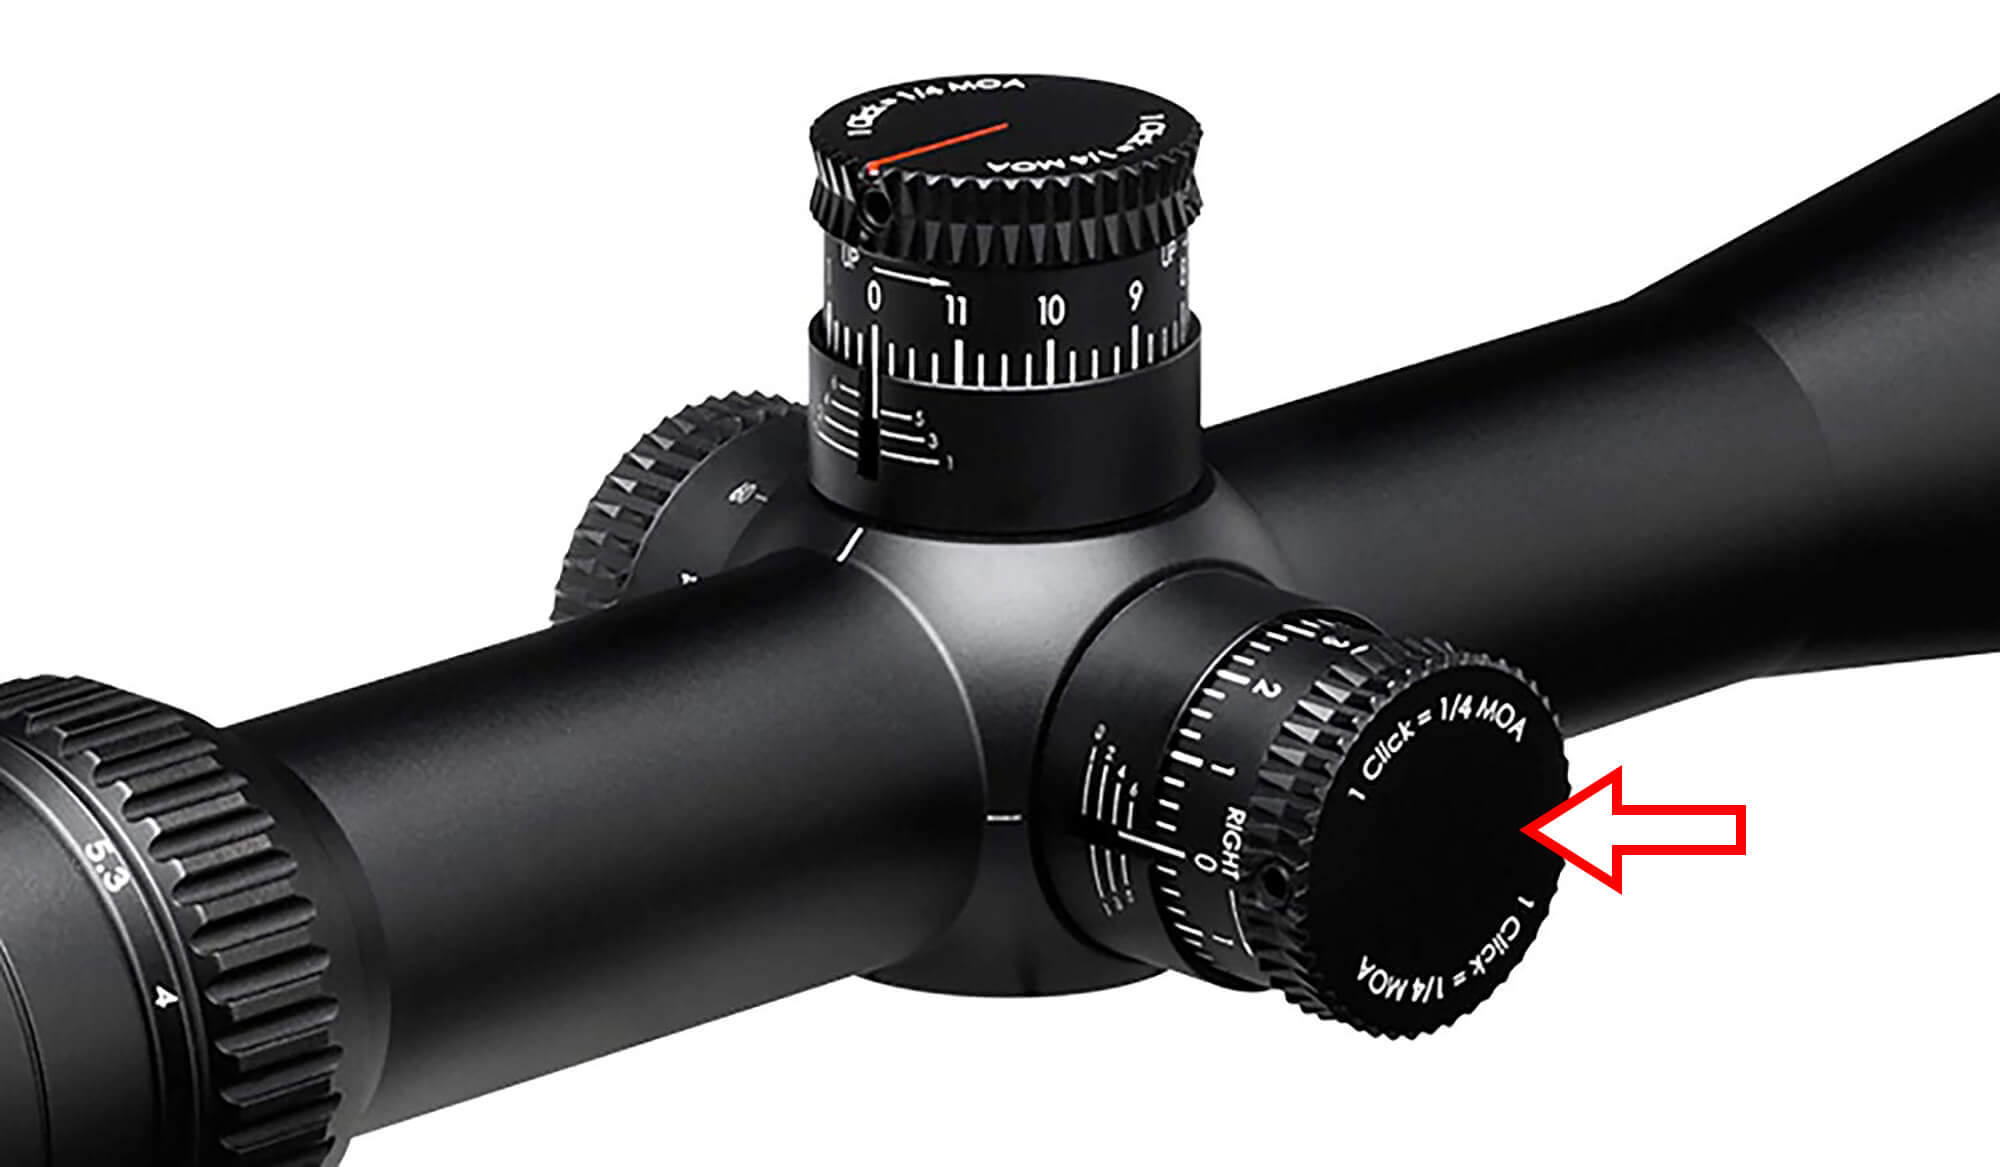
In other words, turning the sight adjustment knob one click would shift the impact point on the target by the said angle.
-
Find out how many clicks you have to turn the sight elevation and windage knobs by
dividing
the values obtained in paragraph 5 by the sight adjustment increment.
Example:
- you are zeroing your rifle at 50 yards, and your shot group is to the left and below the target center;
- AIP is 2 inches to the left and 6 inches below;
- the sight has reticle movement of 1/4 МОА per click.
Calculations:
Deviation: 2 × 2 = 4 МОА to the left, 6 × 2 = 12 МОА down.
Required adjustment:
4 МОА / 0.25 = 16 clicks to the right.
12 МОА / 0.25 = 48 clicks upwards.
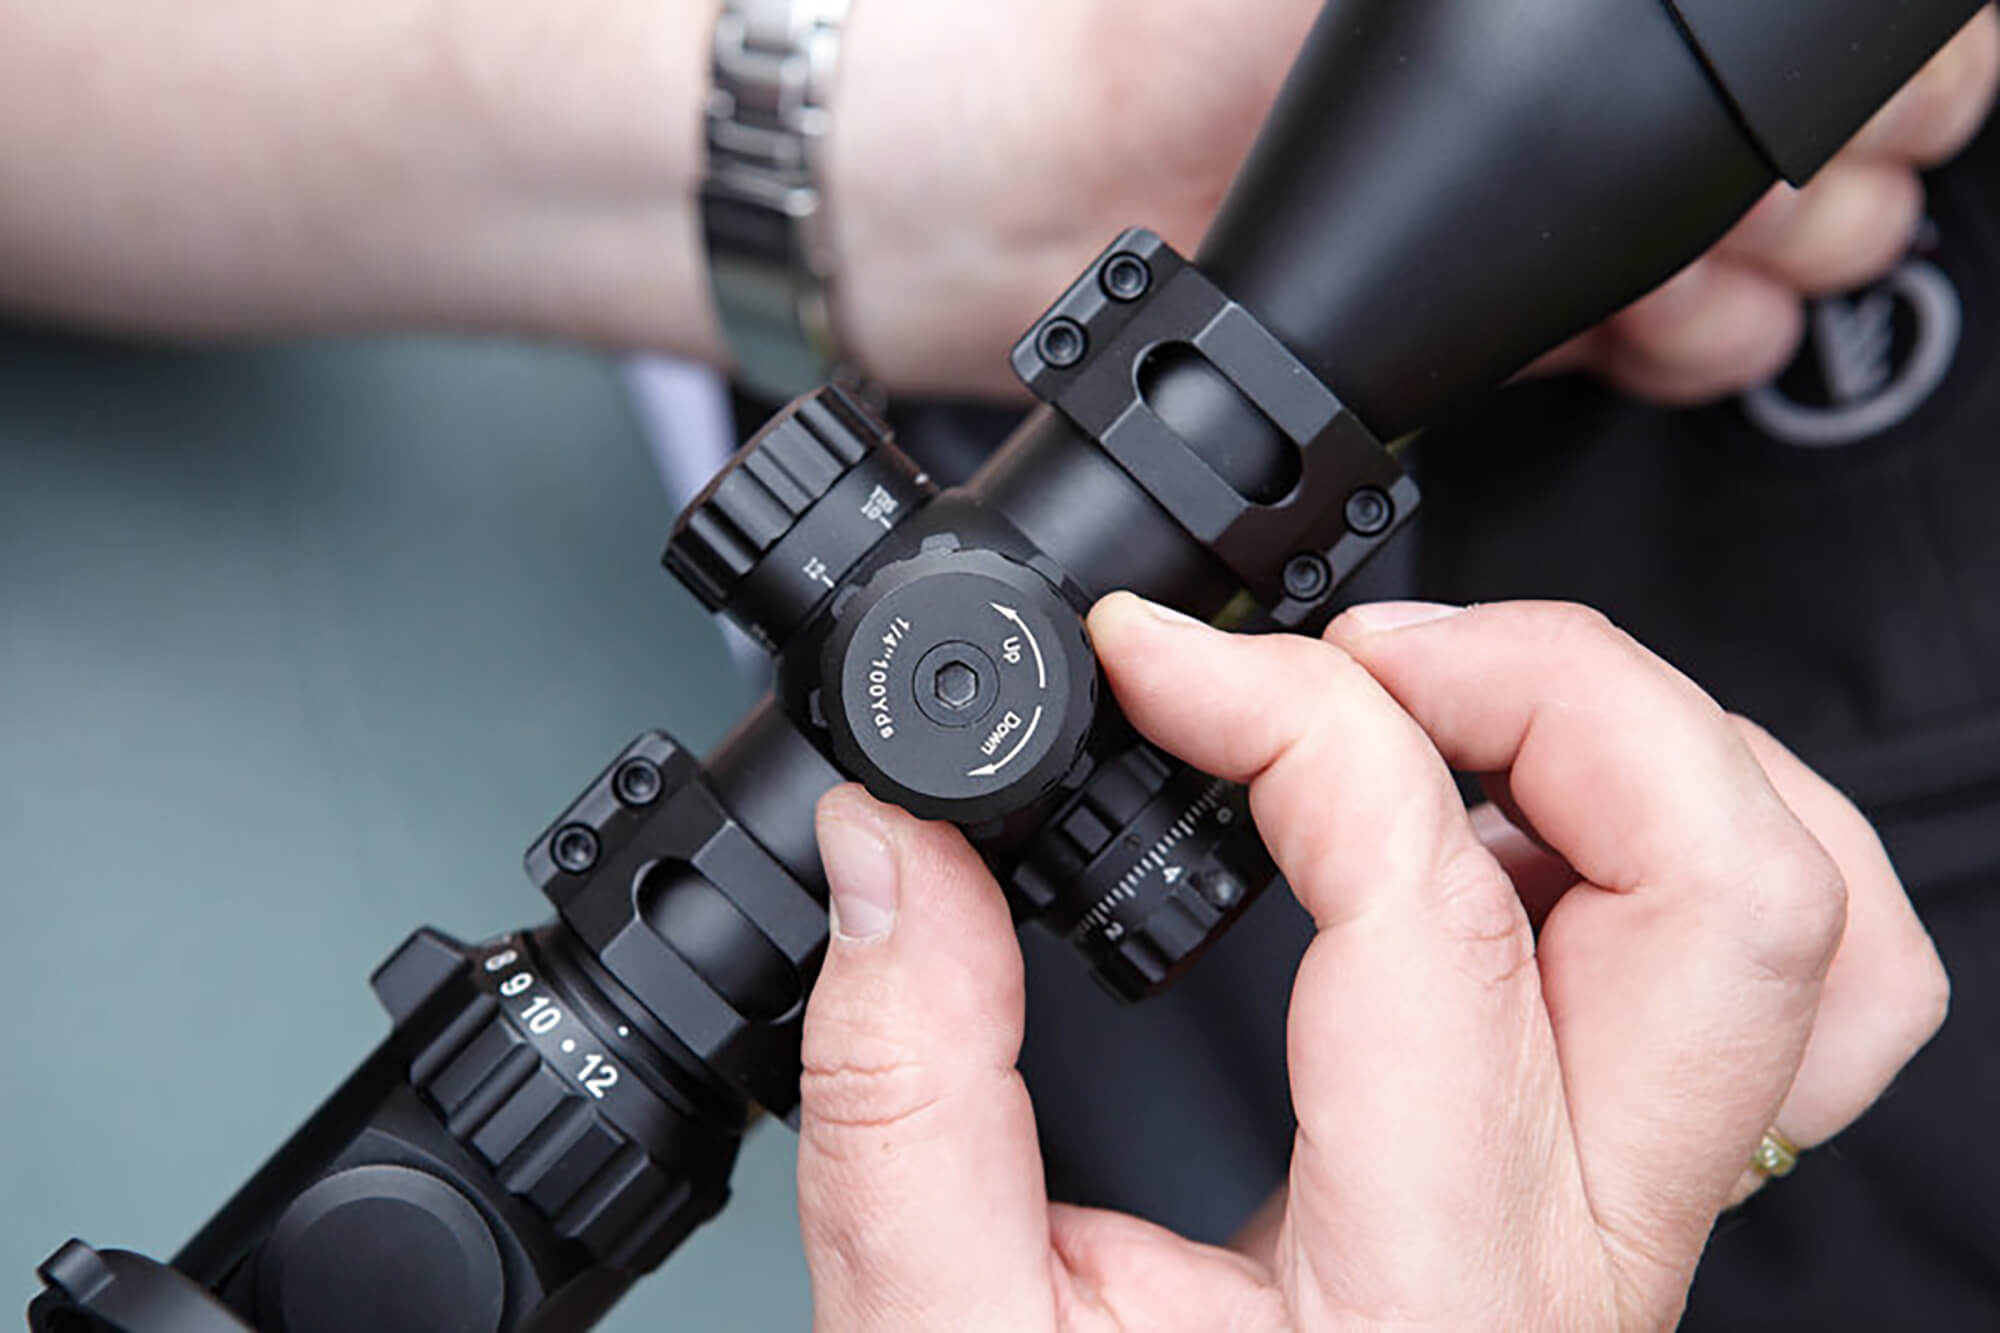
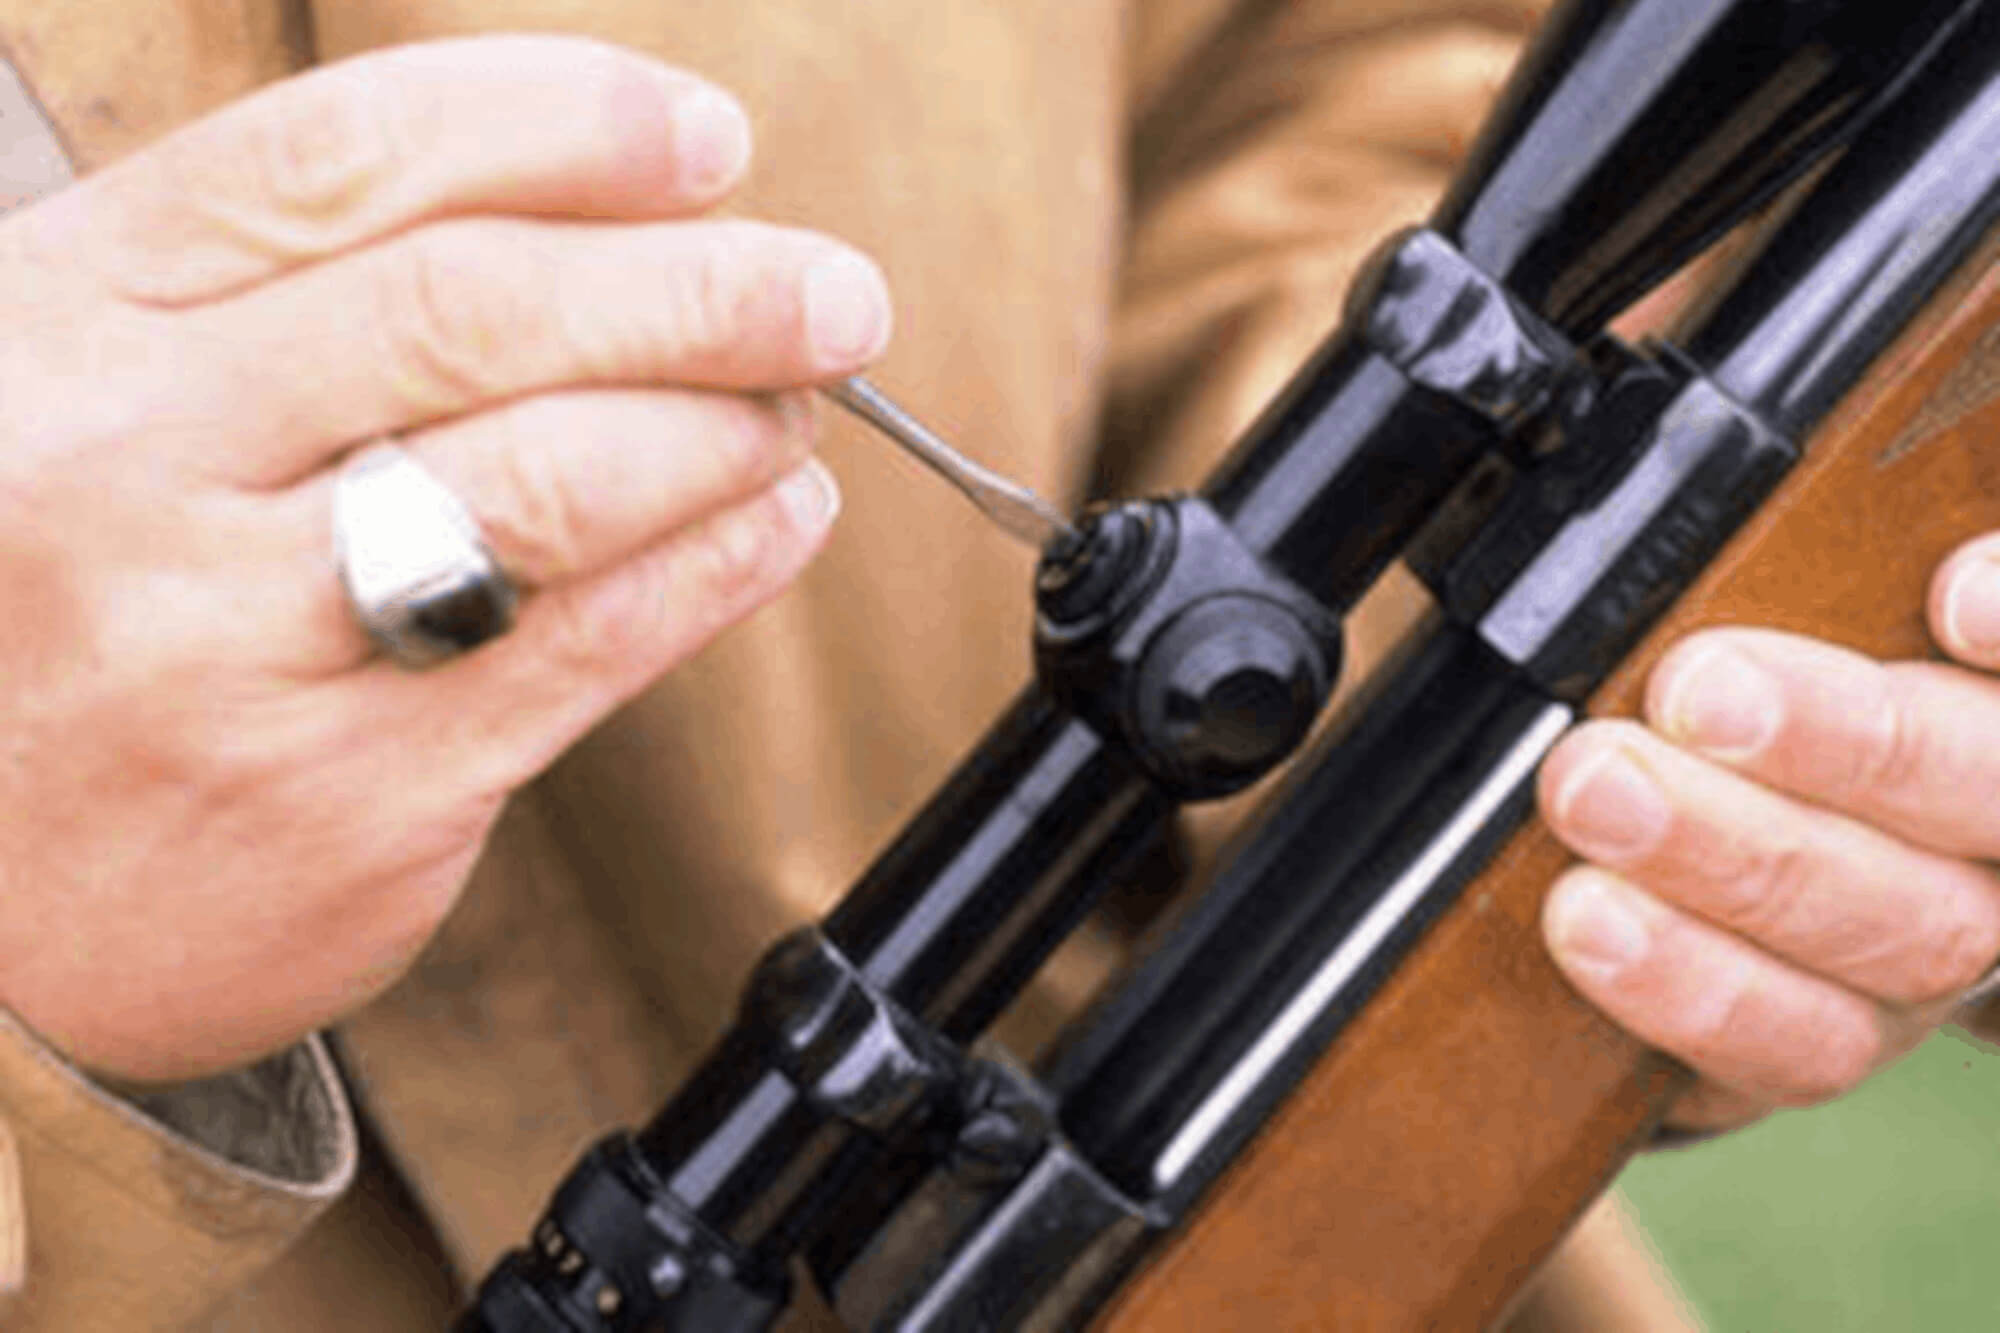
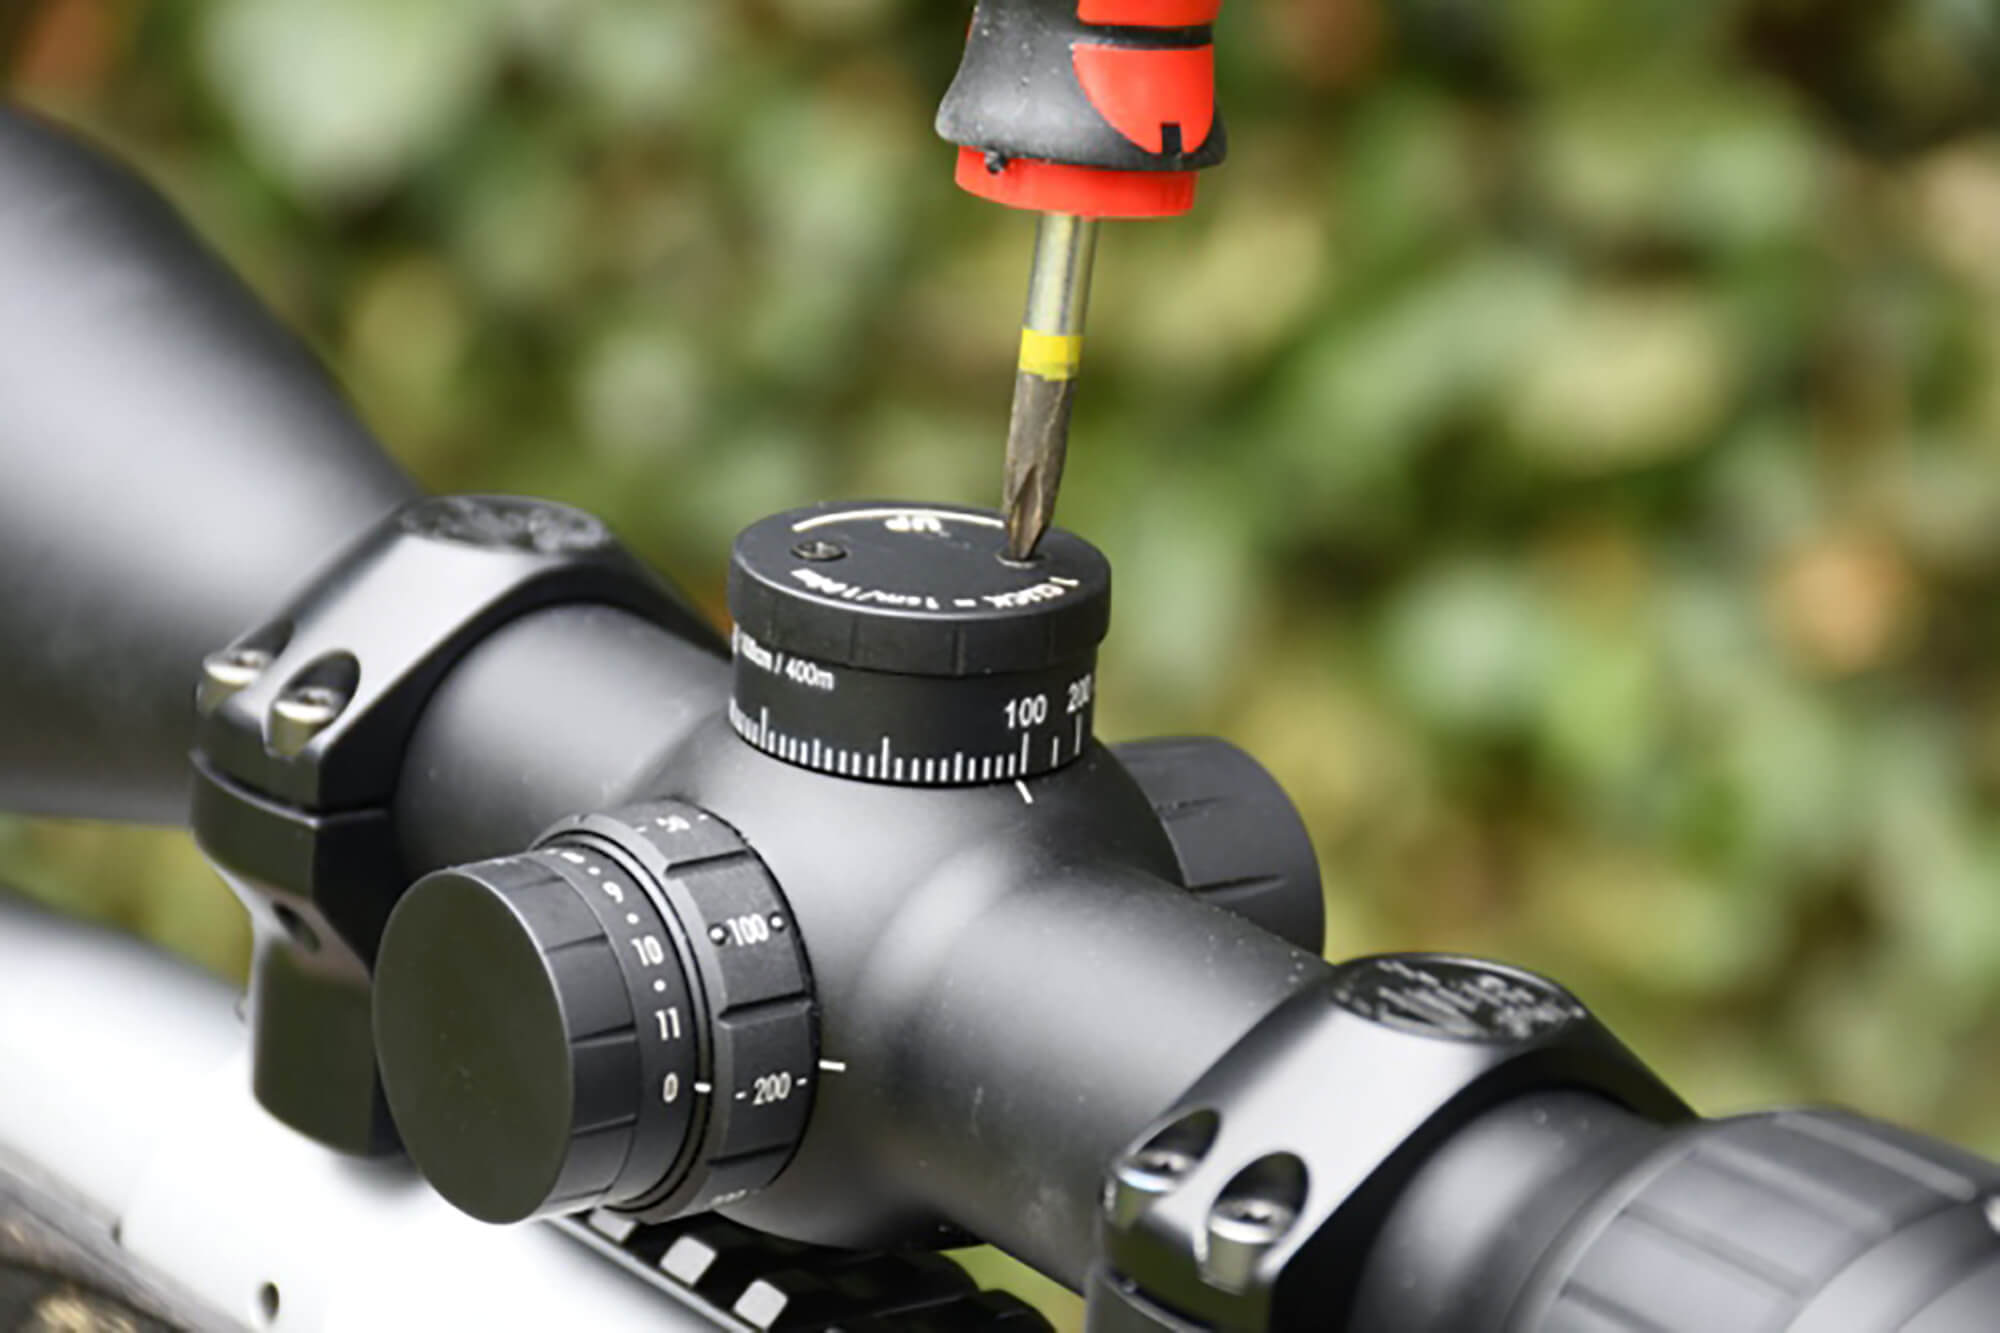
- Adjust the sight.
For tactical sights, you can do it by rotating special adjustment knobs; for hunting sights, using a screwdriver and special screws located under protective caps.
- Repeat the actions described in paragraph 4 and make sure that AIP and the target center match. Otherwise, repeat the actions described in paragraphs 5 to 9.
 Zero out the position of adjustment knobs or zeroing screws (if the sight’s
design
allows it), or write down their indications for the preset distance.
Zero out the position of adjustment knobs or zeroing screws (if the sight’s
design
allows it), or write down their indications for the preset distance.- (optional) Verification using a ballistic calculator
- Enter full cartridge data (bullet weight, muzzle velocity, ballistic coefficient), sight height, sight incline angle and other parameters in the ballistic calculator and calculate the adjustments for the 300 m distance.
- Set a reference target at 300 m, make the calculated adjustments on the sight and fire four rounds, determining AIP as described in paragraph 5.
- If AIP is located in the target center, you have successfully zeroed your firearm.
How to ZERO your ATN X-Sight 4K Pro
I found this process to be very simple and easy to do, plus it saved me a ton of ammo zeroing with the One Shot Zero Feature.
Let’s start.
To zero your SMART HD scope you will need:
- Zeroing Target.
- Gun vise or Sand Bags to keep the rifle steady and in place.
- A minimum of 25 yards distance to the target.
- At least 2 rounds. You can do it with one, hence the “One Shot Zero” but I like to squeeze out one more to double check.
Step 1 – Bore sight the optic
Step 2 – Place your rifle in a fixed position 25-100 yards away. Center the crosshairs on the target and fire one shot.
Step 3 – Go in to system setting and select zero reticle in the profile section. At this point your X & Y should be zero. If the bullet did not hit on paper then you will need to rebore sight or move closer to the target and repeat a shot. If you did hit on paper then all you need to do is keep the WHITE reticle on the center of the target and with the scope key pads move the RED reticle to where the bullet hit. Once the RED reticle is in the center of the POI press the OK button to save your X & Y. Choose Save & Exit.
Step 4 – You can also fire another round just to make sure you are zeroed. In my experience it was always dead on the saved X & Y.
That is it. ATN made this process simple and easy to do. Saves time and money on ammo.